Pages

Search your topic!

Showing posts with label Microsoft. Show all posts

Saturday, 11 August 2012

How to Create Password Reset Disk?


For your computer security you can set start up password. Whenever you turn on PC, Windows ask you to enter password. Then you enter password and get access to the desktop. And all of us know that it is a normal process. 

But, if your forget your password? Then what? 

You might think experts can easily break it and have access to the PC! And as you're not expert so enter the DVD in the drive and start installing Windows again. And you lose all of your files and folders that is stored on installation drive. 

But you can avoid such type of hazard very easily. I don't advise you to write down your pass in the diary or calender. Because this is not safe. Just spend few minutes to create a password reset disk. It's safe and easy. And there is no risk. Follow the steps below: 
  1. First make sure you've connected your USB Flash Drive in the port. You don't need to format the disk. And your files will not be affected. 
  2. Then go to the User Accounts from Control Panel.
  3. Now hit on the Create a password reset disk option from the left panel.
  4. You'll see Forgotten Password Wizard. Click Next.
  5. Select the drive that is to be used as reset disk. Click Next.
  6. Enter the current password if any. Otherwise leave it blank. 
  7. Click next and wait for the processing. Click Next again. Then Finish.
The disk is ready for use. Now open your USB drive and look for a 2 KB file named userkey.psw. This is the file that can help you to reset the password. Don't delete it. 


Now restart your PC and try to access by entering a wrong password. You'll see the Reset Password option. Click on it and type a new password. And from now you can use this password. 

You can change your password as many time as you wish by the same disk. 

Click to enlarge image

Caution: Anyone can change your password if he knows about your reset disk. So make sure that unauthorized person is not familiar with your reset disk. 

NB: This system has been tested on Windows 7 and 8. And it will work only on that PC from where the disk is created.  

Fun Fact: You've to create this disk before forgetting password. After forgetting this password, you can't create this disk. 


Stay with Marks PC Solution to get more interesting IT topics!

Friday, 27 July 2012

How to Install Microsoft Security Essentials on Windows XP?


Microsoft Security Essentials is the most reliable antivirus ever made. In fact it is a great step by Microsoft Corporation to provide an antivirus to the Windows users at free of cost. Though it is very harmful for the third party security companies. 

Windows 7 users can easily install MSE on their computers. But if you're using Windows XP then you may face problem installing it on your system. To install MSE on Windows XP SP 2 you need some additional files. 

To install MSE on XP SP 2 download the file below. Then install all the three files of the folder. Then install MSE. If your XP is service pack 3 then install only the first file. 


If you use Windows 8 then you don't need any third party security software. Because it has built in security system. 

To know more about Microsoft Security Essentials click here. 


Stay with Marks PC Solution to get more interesting IT topics!

Friday, 13 July 2012

Add a Password on Zipped folder - Windows XP Only


In windows XP, you can protect your files and folders by adding a password. And no software is necessary for this purpose! All you need is just to create a ZIP file and set a password. Let's do it.
  1. First, select the files and folder that needs to be password protected.
  2. Now right click on it and send it to Compressed (zipped) folder. 
  3. Double click on the zipped folder to open it. 
  4. Now click on the file menu and select Add a password.
  5. Type and confirm the password in the Add Password window and hit OK.
  6. From now, whenever someone tries to open this folder, he will be supposed to enter the password to open the file. 
Click to enlarge image


And sorry to note this system has been removed from Windows 7 and Windows 8. 


Stay with Marks PC Solution to get more interesting IT topics!

Wednesday, 11 July 2012

Built in PDF Reader in Windows 8 !


PDF or Portable Document Format is a great way to share your documents with your friends or even in online. Earlier I wrote about both PDF Creator and PDF Reader. These third party tools for creating and viewing PDF is also very handy. 

But how do you feel if you don't need to install any PDF Reader/ Viewer on your PC! Windows 8 has built in PDF viewer named Windows Reader. It comes as metro app with Windows 8. And it can also read your XPS documents. 

If you're running Windows 8 and you have no PDF Reader installed on your system then you will see your PDF files look orange color. Actually this is Windows Reader. Just double click to open the file. 

Or press the start button and type reader. Then press enter to open Windows Reader. After opening the reader click on Browse to open your files and folders. And select the PDF file you wanna read. 

When using the reader you may not be able to see any toolbar. Because it is a metro app that runs in full screen. Simply hit the right button of your mouse to see the toolbar. From this bar you can control your reader whether it will show one or two pages. You can also open your files or save the open file and more. Look at the image below:


To close the reader, simply press Alt + F4. Or drag your mouse from top to bottom of the screen. 


Stay with Marks PC Solution to get more interesting IT topics!

Friday, 6 July 2012

How to Make Windows 7 Genuine - Simple & Easy Way

More than 50% computers are running on Windows 7 OS! This is the market leader now. However the Microsoft is going to launch Windows 8 Final Version at the end of the October, 2012

If you're a victim of software piracy and use illegal version of Windows 7 then you may get continuous error message from desktop. And every time when you open your PC a message will tell you to buy a genuine version of windows. Actually this message is very annoying. 

Sometimes you may need to make your OS genuine to install Microsoft Security Essentials. 

In my previous post I wrote about the easiest way to make Windows XP genuine. And in this post I am showing the way to make Windows 7 Genuine! Let's find out how.
  1. Download the Zipped file from here. 
  2. Now extract the file.
  3. Now double click on Windows 7 Loader.
  4. Then click on install button and restart your PC when asked.
  5. And if you're looking for Advanced Settings then select the Advanced options located at the bottom left corner of the window.

Tips: In Windows Vista, 7 or 8 don't set your Windows Update Setting automatic. It will consume your internet data and not give you a better result actually. To change automatic update go to Properties of Computer > Windows Update >  Change Settings > Important Updates > Select Check for updates but let me choose whether to download or install them. 


Stay with Marks PC Solution to get more interesting IT topics!

Thursday, 5 July 2012

How to Show Hidden Files & Folders of a Flash Drive Caused by Virus

USB flash drive or Memory Card is a great device for sharing files and folders, audio and video, software etc. But at the same time this type of device is also responsible for spreading virus too! A virus can be easily copied from one PC to another by USB flash drives. 

When a PC has no virus protection or not having enough protection be careful when inserting your flash drive in that PC. Because it can affect the software or program stored on it. And other  files like image, audio or video generally not affected by virus. But they may be hidden permanently. 

So, in this post, I am gonna show how to view the hidden files of a flash drive. Let's find out how.
  1. Open My Computer.
  2. Now click on Folder Options located under tools menu. 
  3. Now hit on View Tab.
  4. Now select the Show hidden files and folders.
  5. Deselect both Hide protected operating files and Hide extensions for known file types.
  6. Now click on Apply > OK.
Note: This system works for all versions of windows. But in windows 7 and 8 you may not find the menu bar. In windows 7 to show menu bar press the Alt key then select the tools menu. And Windows 8 users will find it in Windows Explorer at the top right corner of the screen located under view tab named as Options. 


Tips: To protect your files from viruses you can simply store the files in .zip format. Because a virus can't enter into the zipped files normally. To do so, first select the files you wanna zip and then click right button of mouse and send to Compressed (zipped) folder. 


Stay with Marks PC Solution to get more interesting IT topics!

Wednesday, 4 July 2012

Save your Files as PDF in Office 2010!


PDF is one of the most popular method if you wanna share your files. Specially when sharing any report, form or document, PDF is the most reliable and acceptable file format. 

By the way, most of the people use dopdf or other 3rd party software to convert their files into PDF. A procedure of PDF conversion is also posted in this blog. But if you use Microsoft  Office 2010 probably you don't need any other third party software to convert your files into PDF. 

You can convert your files into PDF from the following programs: 

  • Access 2010
  • Excel 2010
  • OneNote 2010
  • PowerPoint 2010
  • Project 2010
  • Publisher 2010
  • Visio 2010
  • Word 2010
To save your files into PDF do the following: 
  1. Open any of the above listed programs (ie. Word, Excel or Access) from Microsoft Office 2010. 
  2. Then hit on the File tab located at the upper left corner of the screen.
  3. Now click on Save as to open Save as box.
  4. Enter the file name in the File Name box.
  5. Now select PDF (*.pdf) from the Save as Type option.


Note: In some cases this system may not produce the desired file quality. If this happens then try this system to convert your files. 


Stay with Marks PC Solution to get more interesting IT topics!

Manually Remove Programs from the Add/Remove Programs List

As an advanced user you may need to install and uninstall different programs on your PC very often. If you do so then you might experience a common problem that almost all other users face. 

That is, sometimes removed program names still shows on the Add/Remove Programs list. Although it creates no problem but enough to bother you. You may think how funny! I removed the program but it shows in the list! 

The main reason of this problem is to delete the program directly from program file instead of uninstalling it. Even it might be caused by any bug in the software. Don't be afraid. Because in this post I am showing an easy and effective solution to this problem. 

Precaution: To do this task you need to modify the registry. So make sure you're capable enough to follow the all steps accurately. Any mistake while modifying the registry may lead to serious problem. 
  1. Press Start + R and type regedit in the Open box and hit Enter Button.
  2. Now locate and click the following registry file: HKEY_LOCAL_MACHINE\Software\Microsoft\Windows\CurrentVersion\Uninstall
  3. Each key under uninstall represent a program. Now find for programs than you removed but still showing the list. 
  4. After you identify the registry key that represents the program that is still in Add/Remove Programs, right-click the key, and then click delete. 
  5. Now close the Registry Editor and go to Add/Remove Program list from Control Panel to verify that the program for which you deleted the registry key is not listed.
Hope this will solve your problem. For your convenience, an image is given for you below. 

Click to enlarge the image

Stay with Marks PC Solution to get more interesting IT topics!

Saturday, 16 June 2012

Hide your Hard Disk Drives from My Computer!!


Sometimes you may not want your friends to access your files and folders. Or you may like to hide a specific drive or all drives of your hard disks. And this trick will also help you to make your friend surprised! 

Group Policy Editor will allow you to do this task. You can do it by following few steps. Let's try: 
  1. Open Run or Press Windows Logo + R.
  2. Now type gpedit.msc and press Enter.
  3. Then hit on Administrative Templates from the left panel located under User Configuration.
  4. Double Click on Windows Components and find Windows Explorer then open it.
  5. Now find and open Hide these specified drives in My Computer. 
  6. Click on Enabled and select Restrict All Drives or the drive you wanna hide and hit OK.


If you again get them back, then follow the above steps. But in the 6th step select Disabled or Not Configured and then Apply ==> OK. Now check My Computer. If the drives are not shown then restart your PC. 


Note: This tricks is for your computer security. You can also surprise others. But don't try to harm people or don't make them scared. 


Stay with Marks PC Solution to get more interesting IT topics!

Friday, 15 June 2012

Keyboard Shortcuts in Microsoft Excel 2010

Microsoft Excel is a popular program released with Office Package by Microsoft. There are nearly 200 keyboard shortcuts for Excel. But it is not possible to memorize all of them. But to accelerate your experience you must know some shortcuts. 

Some of the important shortcut keys are listed below for your convenience: 


Shortcut Keys
Actions
F1Show the help option
F2Edit the selected cell
F5 Go to a specific cell
F7 Check Spelling
F11
Create chart
Ctrl + Shift + ;
Enter the current time
Ctrl + ;
Enter the current date
Alt + Shift + F1
Insert New Worksheet
Shift + F3
Open the Excel formula window
Shift + F5
Bring up search box
Ctrl + A
Select all contents of the worksheet
Ctrl + B
Bold the selected text
Ctrl + I
Italic the selected text
Ctrl + K
Insert Hyperlink
Ctrl + U
Underline selected text
Ctrl + 5
Strikethrough the selected text
Ctrl + P
Print
Ctrl + Z
Undo
Ctrl + F9
Minimize the current window
Ctrl + F10
Maximize current window
Ctrl + F6
Switch between workbooks
Ctrl + Page up
Switch between worksheets upward
Ctrl + Page down
Switch between worksheets downward
Ctrl + Tab
Move between several Excel files
Alt + =
Create a sum formula
Ctrl + '
Copy the formula of above cell
Ctrl + Shift + !
Format number in comma format
Ctrl + Shift + $
Format number in currency format
Ctrl + Shift + #
Format number in date format
Ctrl + Shift + %
Format number in percentage format
Ctrl + Shift + ^
Format number in scientific format
Ctrl + Shift + @
Format number in time format
Ctrl + Arrow key
Move to next section of text.
Ctrl + Space
Select entire column
Shift + SpaceSelect entire row


Note: The above shortcuts are prepared for Office 2007 and 2010. But almost all of them work with all versions of MS Excel. 


Stay with Marks PC Solution to get more interesting IT topics!

Thursday, 14 June 2012

How to Change the Default Color Scheme of Office 2007 & 2010?

The most widely used version of Microsoft Office is 2007. And the use of Office 2010 is also increasing rapidly. Both of them are good in doing the tasks. In case of appearance and performance they are slightly vary. 

But the choice of people are not same. Something that I like you may not. For example I don't like the default color scheme of Office 2007 that is light blue. But 2010's appearance is great. 

So, in this post I am gonna show how to change the color scheme of Microsoft Office. If you change the scheme of MS Word then all programs of Office will have that color scheme. 

Click to Enlarge the Image

Change the Color Scheme of Office 2007 
  1. Open MS Word 2007.
  2. Now Click on the round Office Button located at the top left corner.
  3. Then select Word Option.
  4. Now hit on the Popular from the left panel.
  5. Now you'll be able to see the color scheme.
  6. Now select the color you like. I prefer silver.
  7. Now hit on OK.

Click to Enlarge
Click to Enlarge
Change the Color Scheme of Office 2010 


  1. Open MS Word 2010.
  2. Now hit on the File button located at the top left corner.
  3. Then select the Options.
  4. Then hit on the General from the left panel.
  5. Now look for Color Scheme located under User Interface Options.
  6. Select a color that you like.
  7. Hit on OK.

Click to Enlarge


Stay with Marks PC Solution to get more interesting IT topics!

Thursday, 7 June 2012

Microsoft Equation 3.0 Shortcuts!

Often you may need to create equation in MS Word to prepare your assignment, note or for any other purpose. Whatever your purpose, you must agree with me that this is a too boring job! 

It is time consuming as well as difficult to perform. And sometimes it is very difficult to find a particular option. But from now you'll enjoy typing equation in Microsoft Equation 3.0. Because in this post I'm giving some keyboard shortcuts for Microsoft Equation 3.0.

Office XP and 2003 users can launch Equation Editor from Insert --> Object --> Microsoft Equation 3.0.

And Office 2007 and 2010 users will find it from Object option under Insert Tab located at the upper right corner of the screen. 

As the Equation options are very critical so it is not possible to show them in written format in this blog page. So I'm giving picture of shortcuts. 


Stay with Marks PC Solution to get more interesting IT topics!

How to Show Picture on USB Flash Drive?


Sometimes you may work with several removable drives. They are may be labeled with different names. But sometimes they have labeled only Removable Disk. In that time it may be difficult for you to identify a particular disk. 

In this post, I'm gonna show you how to insert a custom image on Removable Disk or Pen Drive. Follow the steps below: 
  1. First you need to convert your desired image into Icon file format (.ico). If you have no Icon converter then you can download this software. Or you can use any other software as your choice. 
  2. Now insert your disk and open it. You can also use this Online Icon Converter. 
  3. Right click in blank space then go to New and select Text Document. 
  4. Now you can either type or copy and paste the following code: 
[Autorun]
Label=Marks
Icon=Munna.ico
     5.  Now save this file as autorun.inf in your disk.
     6.  Place the Icon image you created in the first step.

Now look at the code. Label will be the name of your Disk. Type a different name instead of Marks. And Icon will be the name of your Icon image. Type a different icon name instead of Munna.ico.

Now remove your disk and insert again. If you don't see the change then restart your PC. If you go through all the steps properly, you must see your picture on your Removable Disk.

Note: In this way, you can change your Hard Disk(s) icon too.


Stay with Marks PC Solution to get more interesting IT topics!

Wednesday, 6 June 2012

How to Show My Computer Icon on Desktop in Windows 8?


As a new user of Windows 8 (Consumer Preview, Developer Preview) you might be afraid when you notice that My Computer Icon is missing from desktop. And instead of desktop there are some metro apps.

In this post you're getting rid of this problem. To show My Computer/ Computer Icon on desktop follow the steps below:
  1. First go to Desktop (Hint: Windows Logo + D). 
  2. Now right click on the desktop and select Personalize located at the bottom of the menu.
  3. In the next screen find Change Desktop Icons from the left panel and hit on it. 
  4. Now select the Desktop icons you wanna see on your desktop.
  5. You can select Computer, Recycle Bin or Control Panel as your choice.
  6. Now select OK and see the result.
You can also change the icon style from here. 


Stay with Marks PC Solution to get more interesting IT topics!

Tuesday, 5 June 2012

Download Windows 8 Release Preview

 Release Preview


Most probably, the windows users have never experienced this type of continuous trial releasing by Microsoft. At first, Microsoft released Windows 8 Developer Preview. Then they released Consumer Preview. And at the beginning of this June they released a new trial named Windows 8 Release Preview. And I don't know whether they have any plan to release any more trial version of Windows. 

Though it is very boring for the users but it may be finally a breakthrough in the history of operating systems. Maybe this is an attempt to compete with Mac OS. Microsoft is very cautious about Windows 8. Because when they released Windows Vista users didn't say it welcome. There were many bugs. And system requirements were unnecessary high.

Maybe Microsoft is trying to avoid such type of mistakes that they've made in Windows Vista. That's why they are releasing so many trial version of Windows 8. And hopefully, Windows users are getting something special at the end of 2012. 


System Requirements:
Note: If you are able to run Windows 7 on your PC, Release Preview will also work fine.

  • Processor: 1 gigahertz (GHz) or faster 
  • RAM: 1 gigabyte (GB) (32-bit) or 2 GB (64-bit) 
  • Hard Disk Space: 16 GB (32-bit) or 20 GB (64-bit) 
  • Graphics Card: Microsoft DirectX 9 graphics device with WDDM driver

Additional Requirements to Use Certain Features: 
  • To use touch, you need a tablet or a monitor that supports multitouch.
  • To access the Windows Store and to download and run apps, you need an active Internet connection and a screen resolution of at least 1024 x 768. 
  • To snap apps, you need a screen resolution of at least 1366 x 768.
  • Internet access.


Download Links: 
32-bit (English Version)
64-bit (English Version)
Other Versions


Stay with Marks PC Solution to get more interesting IT topics!

Thursday, 31 May 2012

How to Disable CD/ DVD Drives?

This is a very funny trick as well as very useful when you trying to prevent your friends from using your CD/ DVD Drive. If you can successfully do it, your CD/ DVD drive will not function until and unless you enable it. Let's have a try.
  1. First, right click on My Computer icon from desktop and select Manage. 
  2. Now you'll be able to a new window named Computer Management.
  3. Look at the left panel and hit on Device Manager. 
  4. Now the list of devices of your computer will appear. Search for CD/ DVD Drives.
  5. Now collapse the CD/ DVD section by clicking the arrow.
  6. Now right click on the Drive and choose Disable. 
  7. From now CD/ DVD drive will not be able to play any disk. But you can just open and close it. 


To enable the CD/ DVD drive, follow the same procedure. All you need to do is just choose enable in the step 6.

Note: In this way you can disable your Mouse, Keyboard, Modem, USB Port too! Choose Uninstall if you don't see the Disable option. If you uninstall your Mouse or Keyboard they may stop working. Don't be afraid. Just unplug the cable and plug it again. And restart your PC. 

Advice: This tip is only valid when this is necessary. Do not upset people by applying this trick. 


Stay with Marks PC Solution to get more interesting IT topic!

Wednesday, 30 May 2012

How to Reduce Windows Start up Time?

A common complaint of PC users is My PC is Too Slow! And it takes a long time to start. And they would like to install Windows again. And after few days they face the same problem. Because the problem was not fixed at all! 

Actually I'd the same problem few years ago. But now I enjoy a fast start up!

Do you like to start your Windows faster? Then follow some simple steps below:

  1. Go to Run by pressing Start Key + R.
  2. Type msconfig and press Enter. 
  3. Now you'll find a a new window named System Configuration. 
  4. Click on Startup Tab from this window.
  5. Here you'll find a list of option with check mark. 
  6. All you need to do is just deselect these options except antivirus, graphics driver, sound driver and few essential programs.


Definitely this work will reduce your booting time. And don't keep any unnecessary software installed on your PC. And remember, the fewer the number of programs installed on your PC the better the performance. And don't forget to delete the temp file (%tmp%), prefetch file (prefetch). Clean up your hard drive and run defragment operation once in a week. 

Note: This tip is applicable for all running version of Windows. Only Windows 8 is slightly different. After going to the Startup tab you'll need to open task manager to control startup programs. 


Stay with Marks PC Solution to get more interesting IT topic!

Thursday, 10 May 2012

How to Show Text Boundaries in MS Word?


When you install MS Office on Your Computer, by default there are some settings that may need to be changed due increase to your convenience. 

The most common problem for every user is to show text boundaries in MS Word after installing Microsoft Office Pack. Text Boundaries show the printable area for text so that a user can easily  understand the layout of the page. 

By default, MS Word shows no text boundary in the document. And this is very bothering personally for me. So, in this post, I'm gonna show you how to set text boundaries in MS Word document.


For Office 2000/ XP/ 2003 Users: 

  1. At first open MS Word. 
  2. Then go to the Options under the Tools Menu and hit on the View Tab. 
  3. Now at the bottom of the window you will see an option named Text Boundaries. 
  4. Now simply place a Check Mark on Text Boundaries. Your Problem gets solved! 

Note: Make sure you're using print layout option. To show your document in Print Layout, go to the View Menu and select Print Layout. 


For Office 2007 Users: 


  1. First you need to open MS Word and then click on Office Button located at the upper left corner of the screen.
  2. Then hit on Word Options > Advanced > Show Document Content > Now place a check mark behind Show Text Boundaries. 


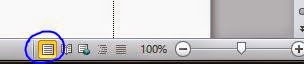
Note: Make sure you're using Print Layout option. You can use print layout by moving to the View tab and select Print Layout. Or look at the bottom of the screen and select print layout located at the left of the zoom option. 


For Office 2010 User: Slightly varies from MS Word 2007

  1. First, open MS Word and then click on the File menu located at the upper left corner of the screen. 
  2. Then Move to the Options > Advanced > Scroll down to the Show Document Content > Now place a check mark behind Show Text Boundaries. 


Note: Make sure you're using Print Layout option. You can use print layout by moving to the View tab and select Print Layout. Or look at the bottom of the screen and select print layout located at the left of the zoom option. 


Stay with Marks PC Solution to get more interesting IT topic!
Free counters!